Generative UI - Tutorial
You open Twitter or LinkedIn, and 9 out of 10 posts are about AI, code generation, or some magical "prompt" that builds a whole app. Maybe you’ve even tried v0, or read that Company X stopped hiring frontend engineers because they built an AI that generates frontend code. If you’re feeling a little overwhelmed or just curious how this actually works, let me walk you through one real, practical way to make it happen.
No hype. No abstract theory. Just a quick, honest breakdown of how to actually use the OpenAI API to turn both text and image inputs into structured, working code. I’ll share the exact prompts I used, a few learnings from building a real demo, and how this changes the way we think about building UI going forward.
This is all you need to begin
import OpenAI from "openai";

const openai = new OpenAI({
  apiKey: process.env.OPENAI_API_KEY,
});

export async function generateReactCode(prompt) {
  const messages = [
    {
      role: "user",
      content: [
        {
          type: "text",
          text: prompt,
        },
      ],
    },
  ];

  const response = await openai.chat.completions.create({
    model: "gpt-4o",
    messages,
    temperature: 0.7,
  });

  const content = response.choices?.[0]?.message?.content || "";

  return content;
}

const code = await generateReactCode(
  "Generate a complete, production-ready React functional component for a landing page of a t-shirt shop. Use Tailwind CSS for styling. Return only the code, with no explanations or markdown."
);
console.log(code);
- https://platform.openai.com/settings/organization/api-keys
- You can set a Limit so you don't have any ($) surprises.
- Don't forget to never push them on your public repo.
And this would be the API response:
import React from "react";

export default function LandingPage() {
  return (
    <div className="min-h-screen bg-white flex flex-col items-center justify-center p-8">
      <h1 className="text-4xl font-bold mb-4">
        Welcome to the Monster Tee Shop
      </h1>
      <p className="text-lg text-gray-700 mb-6">
        Get your hands on the boldest T-shirts in town!
      </p>
      <button className="bg-black text-white py-2 px-4 rounded hover:bg-gray-800">
        Shop Now
      </button>
    </div>
  );
}
The End (Sort of)
If you simply hook a text input to this request and send your user's prompt... you're done!
You now have the basics of text-to-React generation working.
But...
Maybe you’re already thinking:
- "I don't want Tailwind classes cluttering my code."
- "I have my own architecture and design system."
- "What about integrating a state management library?"
- "How would this work for more complex or dynamic scenarios?"
Good questions.
And that’s exactly where we go next.
Meet (Definitely) NOT V0
I wanted to create a tool inspired by the powerful V0 to showcase how effective your results could get using different types of prompts.
The idea behind this proof of concept is simple: allow users to input text or images and generate complete, even complex, pages using React.

It acts as a senior React web engineer.
Its job is to convert natural language or image-derived descriptions into clean, modern React functional components — outputting only code, ready to be rendered using the react-live package.
Here's an example of the output when asked to create a shop landing page:
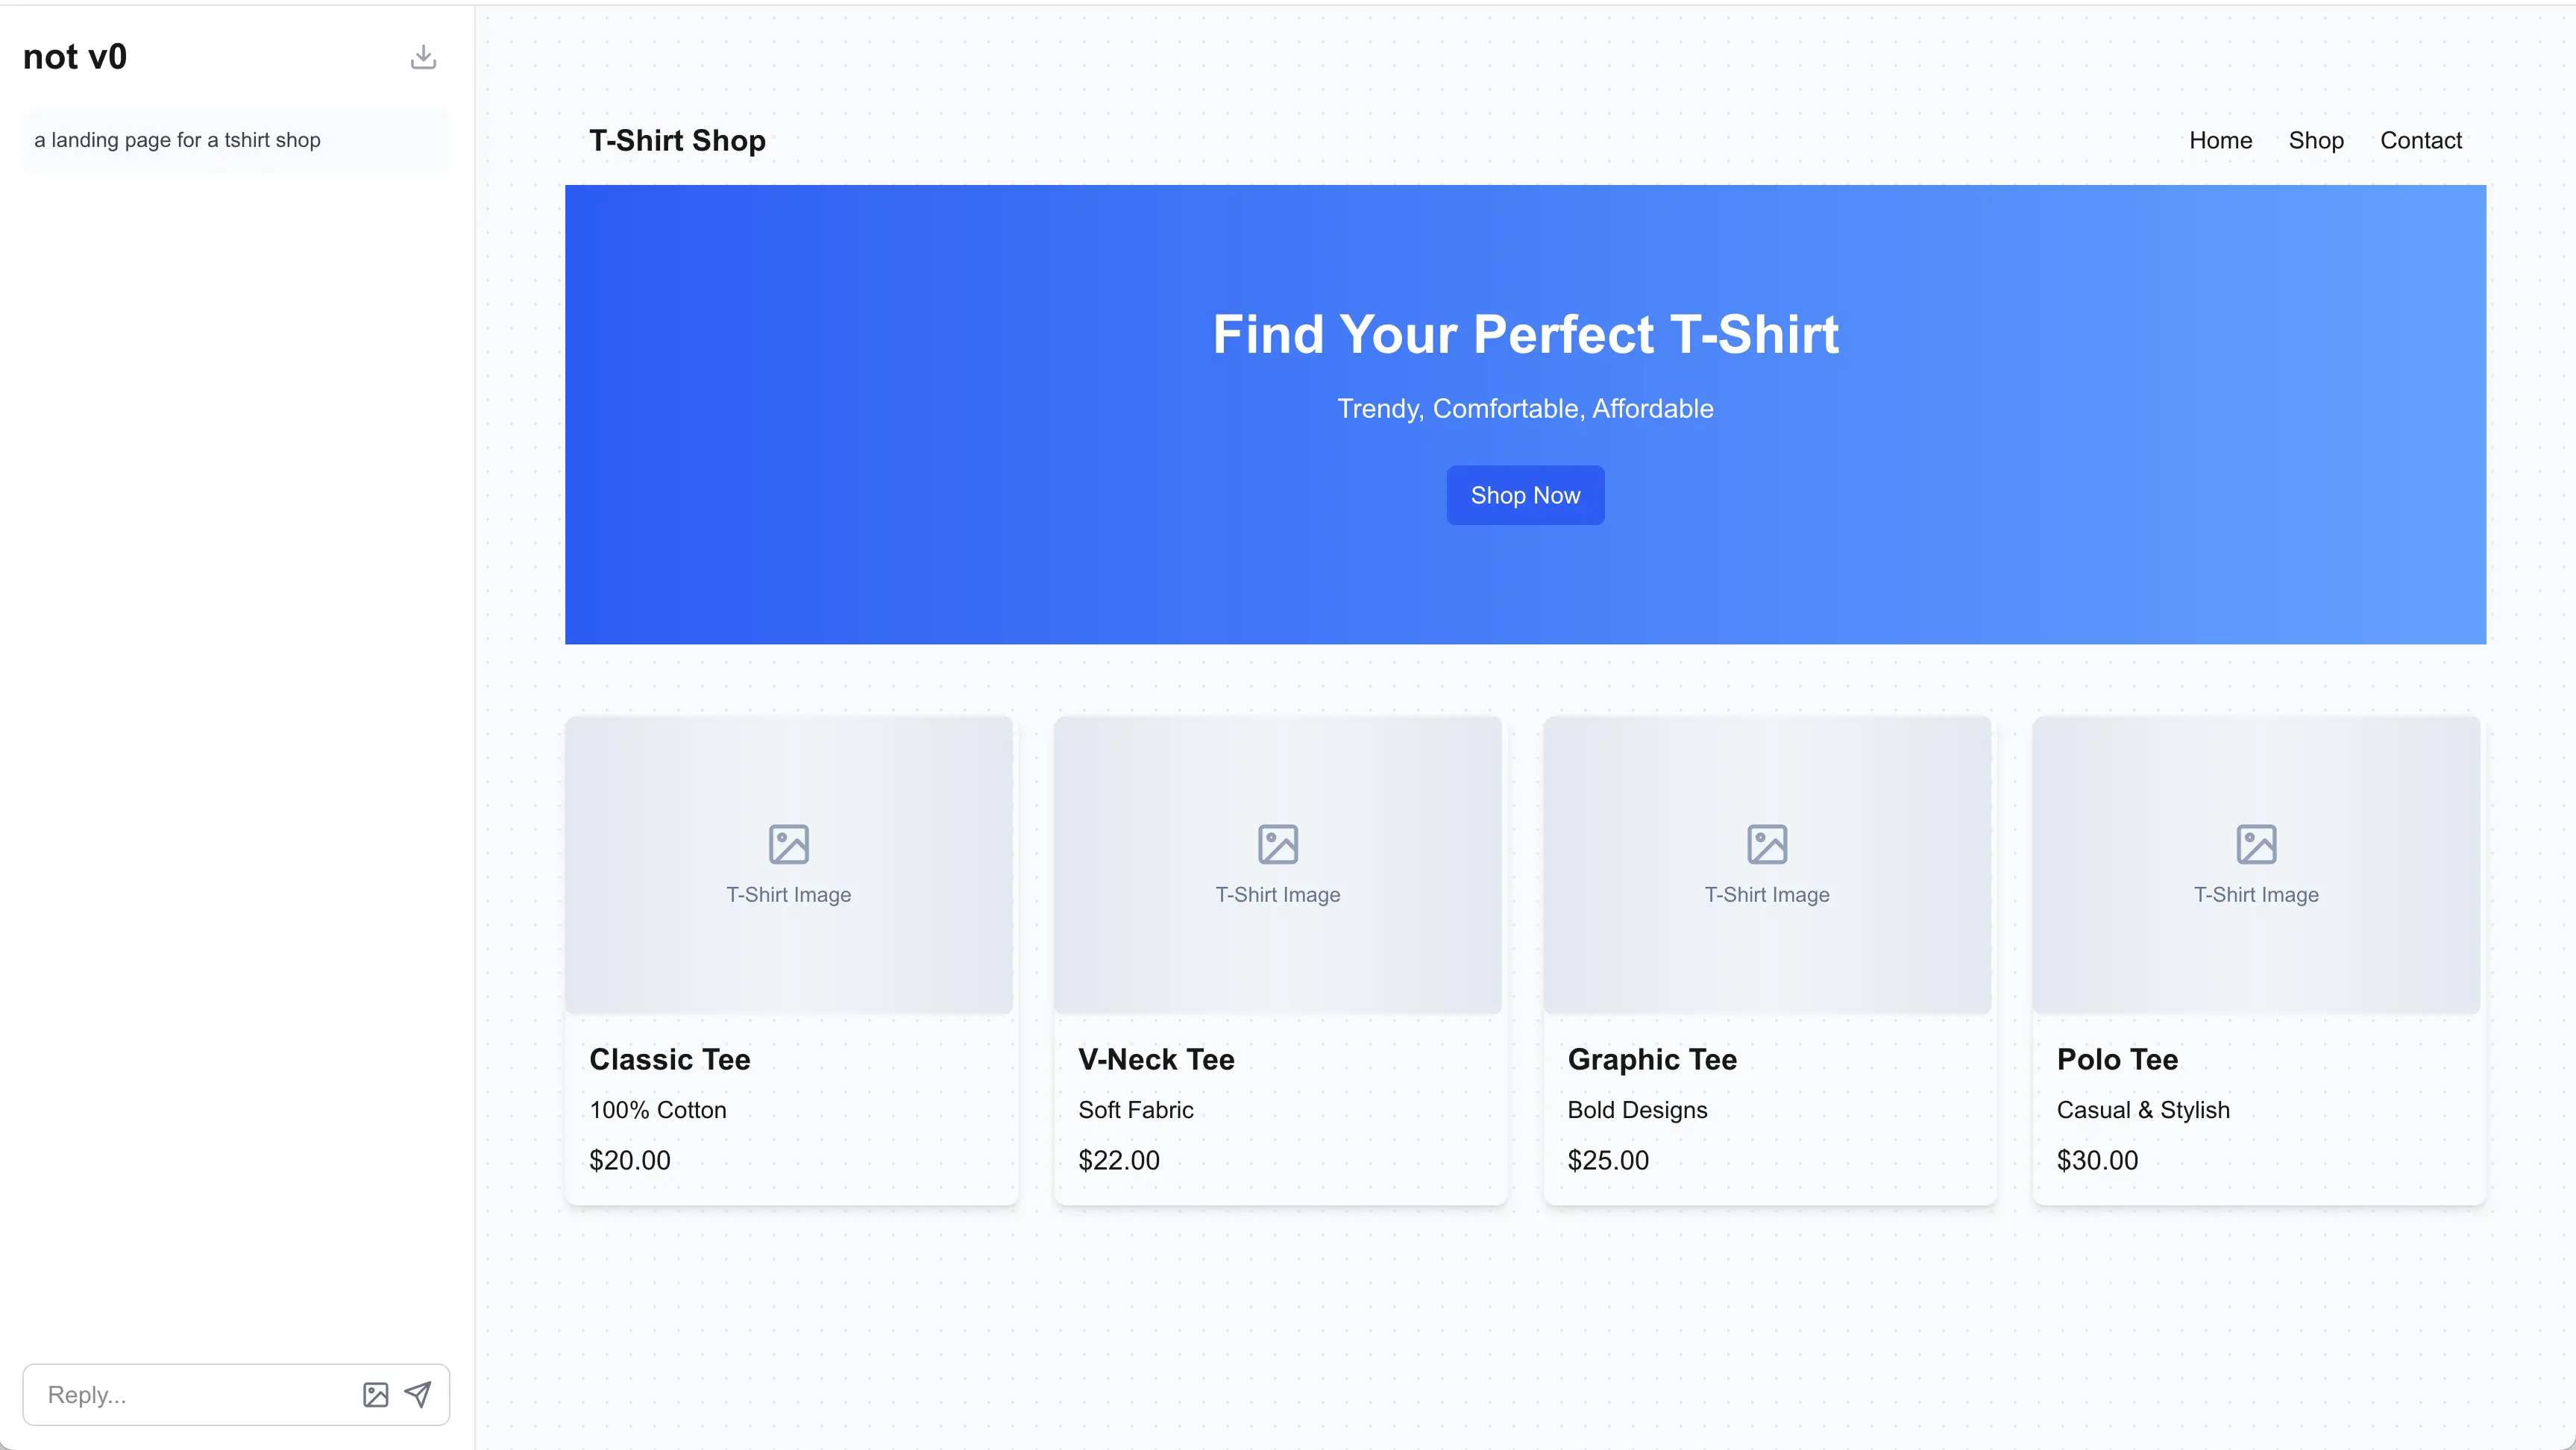
It's not bad when you realize it:
- Uses proper accessibility tags
- Designs responsively
- Structures layout in a modular, scalable way
To achieve this, we send a system prompt along with the user's request.
System prompt
A system prompt is a hidden instruction we send to the AI that defines how it should behave — like setting the rules before the conversation starts.
It's crucial because it shapes the entire style, quality, and structure of the code that gets generated.
const messages = [{
    role: "user",
    content: [
      {
        type: "text",
        text: prompt,
      },
    ],
  },
  {
    role: "system",
    content: `You are a senior React web engineer. Your job is to convert natural language or image-derived descriptions into clean, modern React functional components. Output only the code — no markdown, no imports, no comments, no explanations.

    Your components must run directly inside a React Live environment and follow Tailwind CSS conventions.`,
  },
];
What Makes a Good System Prompt?
A good system prompt is short, sharp, and specific.
You want it to be detailed enough to guide the AI clearly, but not so long that it starts confusing or "overthinking" the task.
Good prompts tend to:
- Define the role clearly ("You are a senior React web engineer")
- Set the output format ("Output only the code")
- Add important constraints ("No markdown, no imports, no comments")
- Mention conventions if needed (like "Use Tailwind CSS" or "Ensure accessibility")
Tradeoffs to keep in mind
- Too short? The AI might be too generic or sloppy.
- Too long? It might forget parts of it during generation or get bogged down trying to satisfy every detail.
- Best balance? Focus only on what's critical to get a good first version — you can always refine later through additional prompts.
- Price: The amount of tokens will set the price of the request.
How good was my system prompt?
Coming back to my example above — do you think it was a good or bad system prompt?
It could definitely be better.
The final version, which you can find in the repository at the end, has 10,000 characters, which translates to approximately 2,647 tokens.
How much does a request cost?
OpenAI charges based on the number of tokens sent (input) and received (output).
| Model | Input price per 1,000 tokens | Output price per 1,000 tokens |
|---|---|---|
| gpt-4o | $0.005 | $0.015 |
A typical system prompt with around 2,647 input tokens and an average output of around 2,000 tokens would cost approximately:
- Input cost:
(2647 / 1000) * 0.005 ≈ $0.0132 - Output cost:
(2000 / 1000) * 0.015 ≈ $0.03 - Total cost ≈ $0.0432
In other words, each request would cost around 4–5 cents using GPT-4o.
Tip: Longer system prompts or large outputs will naturally cost more, so keeping prompts concise not only improves focus but also saves money.
Creative Ways to Reduce Token Usage
One creative way to minimize token usage and keep costs down is to leverage components already built in your codebase (specially if you already have built a components library / design system). Instead of having the AI generate the entire component code from scratch, you can:
- Build your components first: Create the reusable components yourself, adding any necessary logic, styling, and structure.
- Mention them in the system prompt: In your system prompt to the AI, reference the component names and their APIs instead of asking the AI to generate everything. This significantly reduces the amount of tokens the AI needs to process and can result in cleaner, more efficient code.
In my not-v0 project I was tired of seeing ugly image placeholders being generated so I updated the system prompt with:
Placeholder Images
- ❌ Never use external placeholder image services like
https://via.placeholder.com/...orhttps://placehold.co/... - ✅ Always use the pre-scoped
ImagePlaceholdercomponent for any placeholder image (e.g., in product cards, banners, or avatars) - ✅
ImagePlaceholderaccepts atextprop to describe the content (e.g.,"Product Image","Hero Image"), and will render a stylized, animated wave-pattern background using Tailwind
Conclusion
And that's all for this one! There are many other cool things you can do with these examples, like sending the previously generated result to the next request, so your AI will have context. For instance, if the prompt is something like "make it red," the model will understand the previous context and modify the result accordingly.
You can also fine-tune the model and create your own version based on customized instructions. With fine-tuning, you can upload your own data and train the model to behave exactly as you want it to (https://platform.openai.com/docs/guides/fine-tuning).
I hope you’ve learned something from this article. If you liked what you read, feel free to star the repo, as I don’t have any analytics tracking you on this simple blog.
If you would like to see a part 2 where I show how to replicate other v0 functionalities, let me know on Twitter @jeanbauerr.
- Repo link https://github.com/jeanbauer/not-v0